Showing posts with label Stamps. Show all posts

Wednesday, 20 February 2019

Art Journal Page- Believe in Yourself by Dutt Preety


Hi friends :)
Good Morning !

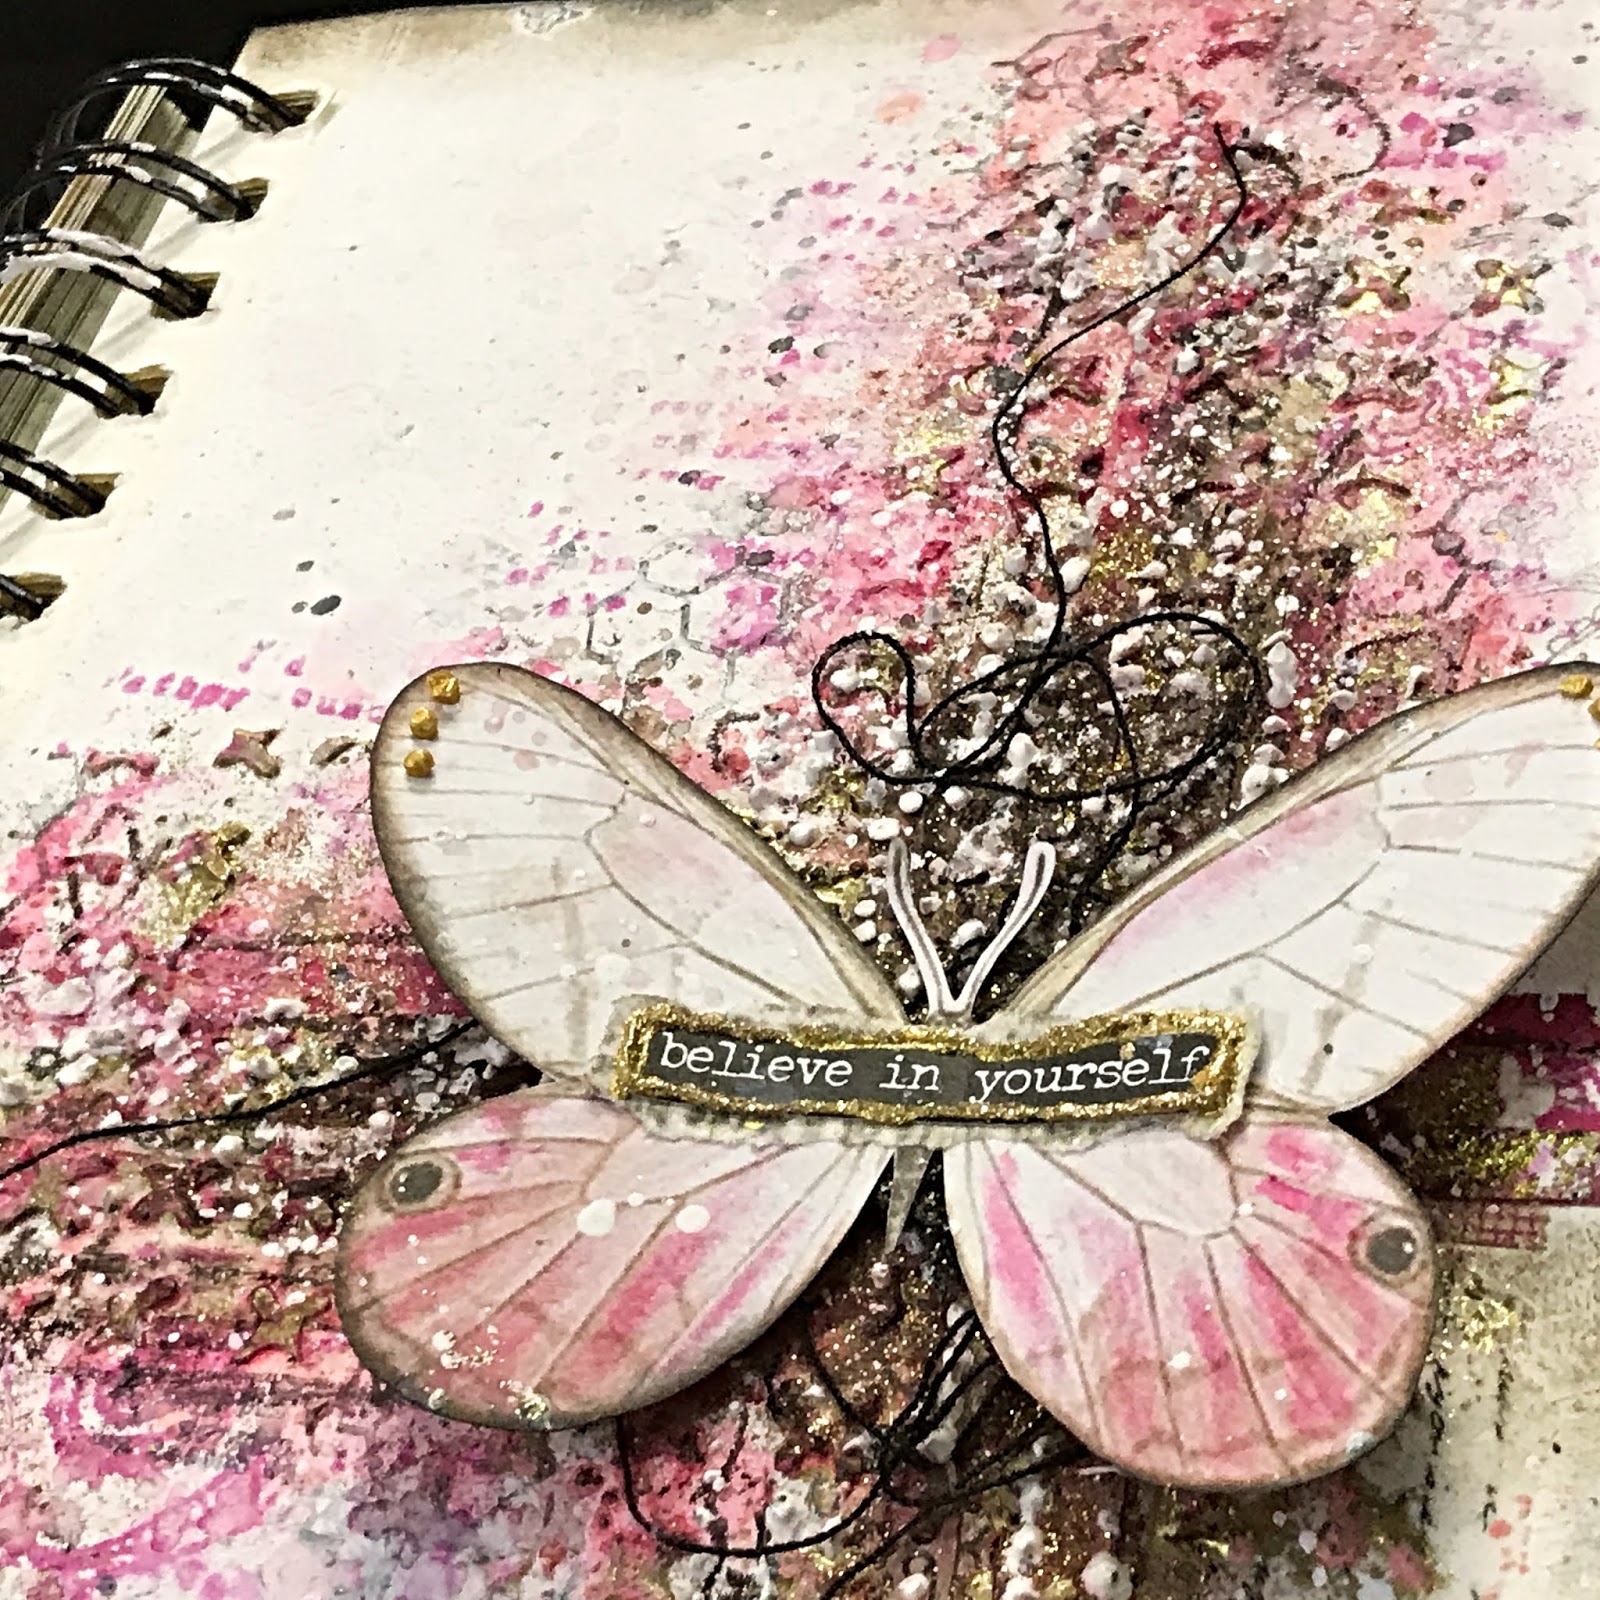
Today, I'd like to share an Art Journal Page- Believe in Yourself.
This is my inspiration for Art & Soul Studio's February Challenge
I was inspired by the pinks in the beautiful moodboard. For bling, I've added gold glitter tape, done heat embossing with gold embossing powders & added a few gold drops. 
I've prepared a step-by-step pictorial of the process.  
Let’s get started :) 

Art Journal Page- "Believe in Yourself"


Pictorial:
Step 1: Created the basic composition by adhering washi tapes, fabric tapes & gold glitter tape to the art journal page using matte gel. Applied clear gesso to the page to prepare it for media work

Step 2: Applied Modelling paste through a Tim Holtz stencil & while it was wet, sprinkled on gold embossing powder and heat embossed it using a heat tool 

Step 3: Added color to the page using Gelatos. Scribbled on the textured surface with the gelatos and also watered them down to add splatters to the page. (Applied some of the color using a palette knife to get a grungy look). While the color was wet, sprinkled Gold Tinsel embossing powder to some areas and heat embossed it to get a textured and glittery look

Step 4: Added dark color to the page (especially in the center) using a dark brown Gelato, also distressed the edges of the page using the gelato & distress inks. Created splatter with the watered down gelato

Step 5: Did background stamping using AAll & Create stamps, distress inks & oxide inks

Step 6: To add more texture and interest, applied modelling paste to the page through a stencil and also created white splatter using watered down white gesso 

Step 7: Adhered black thread to the wet modelling paste 

Step 8: For the focal element, cut out a butterfly from a pattern paper by Stamperia & used a Tim Holtz sticker as the quote. To make the butterfly match the background, added some shading to it using a pink gelato and a blending stump. Outlined the sentiment with an outliner and heat embossed it in gold to make it stand out. 


Products Used:

Tim Holtz Idea-ology Small Talk Stickers

Please don't forget to join Art & Soul Studio's February Challenge. There are awesome prizes on offer & we have a stunning mood board every month. For inspiration, please check out the gorgeous projects made by my talented team mates. All the details about the February Challenge can be found HERE. And you can upload your challenge entries HERE on facebook. 


Lastly, please do share your beautiful work with us on our Facebook group- Soul Sisters, we would love to see what you create with supplies from the Art & Soul Studio Store.

Thanks a lot for your precious time :)
Stay Blessed! 
Preeti

Saturday, 22 December 2018

Set of Clean & Simple Cards for the Holidays by Dutt Preety

Hi friends!
Good Morning :)

Preeti Datta (aka Dutt Preety) here.
Since Christmas & New Year are upon us, firstly, I'd like to wish everyone a blessed holiday season :) 
For today's post I've prepared a Set of Clean & Simple (CAS Style) Cards for the Holidays.
These are fun & easy to make and great for giving to loved ones.  

Set of Clean & Simple Cards for the Holidays


 Card 1- Happy Holidays


Card 2- Season's Greetings 


Card 3- Merry & Bright


Card 4- Merry Christmas 


Process:
1. Die cut watercolor paper panels using a stitched rectangle die
2. Cut out frames in the centre of the panels using Memory Box's Double Frame Die.
3. Stamped images using Tim Holtz Cling Stamps onto the die cuts
4. Lightly watercoloured the images using Zig Clean Color Real Brush Markers
5. Adhered the panels onto A2 sized grey card bases
6. Foam mounted the framed panels at the center of the cards
7. Adhered Tim Holtz stickers for sentiments and small silver bows as embellishments.

Products Used:

Tim Holtz Idea-Ology Small Talk Stickers

Please don't forget to join Art & Soul Studio's December Challenge. There are awesome prizes on offer & we have a stunning mood board every month. For inspiration, please check out the gorgeous projects made by my talented team mates. All the details about the December Challenge can be found HERE.

December Moodboard:

Lastly, please do share your beautiful work with us on our Facebook group- Soul Sisters, we would love to see what you create with supplies from the Art & Soul Studio Store.

Thanks a lot for your precious time :)
Stay Blessed!
Preeti

Monday, 19 November 2018

Just be you - art journal

 
Hello to all of you, beautiful artistic souls, It's Libeeti Frenkel here, as a Guest Designer with my first project for Art & Soul Studio.
I was inspired by the current challenge - 'Use Red':
I decided to make an art journal spread, to express the message the older me would give to the younger me.
I've made a short video about the creative process:
The products that I've used:
7 Dots Studio - Writer's block tags and die cuts; Furtune teller 6x6 pad; Thoughts Keeper stamps.
Lindy's Gang - Guten Tag Teal shaker, Twany Turqouise Vintage spray, Candy Cane Red Gold embossing powder.
Ranger's Archival ink - vermillion, watering can, shadow gray, jet black.
Kaisercraft - texture stains clear stamp set.
Unknown - circle stamps.
Here're some close-ups:


I hope you liked my art journal spread.
'Till next time...

Libeeti 

Friday, 26 October 2018

Vintage Inspired Mixed Media Layout "Prince" by Dutt Preety

Hi friends :) 
Good Morning!

I'm very happy & thankful to be on the Art & Soul Studio blog today. 
This is my first DT project for Art & Soul Studio, so I hope you'll enjoy it! 
I have created a Vintage Inspired Mixed Media Layout- "Prince" along with a pictorial. 

Vintage Inspired Mixed Media Layout- Prince


Here are some close-up photos of the layout:


Pictorial:

Step 1: Applied clear gesso to a 12 by 12 piece of heavy white cardstock (to prep it for mixed media), then mixed Dark Chocolate Impasto Paint with Modelling Paste to create a dark texture paste, applied it through one of the stencils from Tim Holtz Mini Stencil Set #27. Then added color to the background using various shades of blue & brown sprays by Lindys Gang. 

Step 2: Did background stencilling by sponging on distress inks through a couple of stencils from the Tim Holtz Mini Stencil Set #27

Step 3: To create DIY vintage looking papers (for the photo mats), I used book pages, scrunched them up to create creases, then dyed them with a solution of water mixed with 1 packet of instant coffee & a few drops of distress ink reinkers. Added splashes of more intense color in some spots to create a worn out, old look. Let these air dry. 

Step 4: Did background stamping using archival & distress inks and texture as well as script stamps 

Step 5: Chose the focal element (a vintage photo) from Tim Holtz Found Relatives Cards, punched it out with a circle punch. Collected all the elements for layering, including twine, burlap, corrugated cardboard, DIY vintage papers, cheese cloth, chippies, gems, crochet lace and thread. Deckled & distressed the edges of all the papers & adhered everything down to create a visually pleasing composition. Used Tacky glue to stick the elements & used pieces of cardboard as well as foam tape between some of the layers, to create added dimension

Step 6: In the end, created ink splatter using watered down distress inks, added some quotes using stickers, added a bit of shine to the project using Finnabair's waxes and drew on a few scribbly borders for the sentiments. 

Products Used: 


Please don't forget to join Art & Soul Studio's Monthly Challenge. There are awesome prizes on offer & we have a stunning mood board every month. For inspiration, please check out the gorgeous projects made by my talented team mates. All the details about the October Challenge can be found HERE


Lastly, please do share your beautiful work with us in our Facebook group- Soul Sisters, we would love to see what you create with supplies bought from the Art & Soul Studio Store

Thanks a lot for your precious time 
Have a great weekend :)
Stay Blessed!

Blue Fairy on a Pink Donut Fantasy Acrylic Painting Tutorial

  Blue Fairy on a Pink Donut Fantasy Acrylic Painting Tutorial Glamour Shots Hey there everyone, Kristina ...