Showing posts with label florals. Show all posts

Tuesday, 19 March 2019

Floral Mixed Media Tag by Dutt Preety


Hi friends :)
Good Morning !

Today, I'd like to share a Floral Mixed Media Tag- "Smile"
I was inspired by the gorgeous colours of the March mooboard. 
I've added die cut leaves to the tag. 
Hope you'll join the March challenge. There are awesome prizes on offer!

Floral Mixed Media Tag- Smile


Process:

Step 1: Took an XL size tag & applied modelling paste through a Tim Holtz stencil to create background texture
Step 2: Applied black gesso to the whole tag, to prepare it for coloring.
Step 3: Used Lindy's Sprays to spray on different shades of purple onto the tag & coloured a piece of lace using the same colours
Step 4: Used Finnabair's waxes to add highlights and accents to the tag
Step 5: Adhered die cut leaves, a Little Birdie flower, sisal and a sentiment chipboard onto the tag using 3D Matte Gel 
Step 6: Mixed mini beads, glitter & art stones with 3D Matte Gel & applied this paste to some areas of the tag
Step 7: Created splatter using watered down acrylic paints, darkened the edges of the tag with archival ink & tied the coloured lace at the top.
  
Products Used:

Prima Finnabair Mini Art Stones & Art Stones
Ranger Archival Inkpad- Jet Black

Please don't forget to join Art & Soul Studio's March Challenge. There are awesome prizes on offer & we have a stunning mood board every month. For inspiration, please check out the gorgeous projects made by my talented team mates. All the details about the March Challenge can be found HERE. You can add your March Challenge entries in the facebook album HERE

March Moodboard

Lastly, please do share your beautiful work with us on our Facebook group- Soul Sisters, we would love to see what you create with supplies from the Art & Soul Studio Store.

Thanks a lot for your precious time :)
Stay Blessed!
 Preeti

Sunday, 27 January 2019

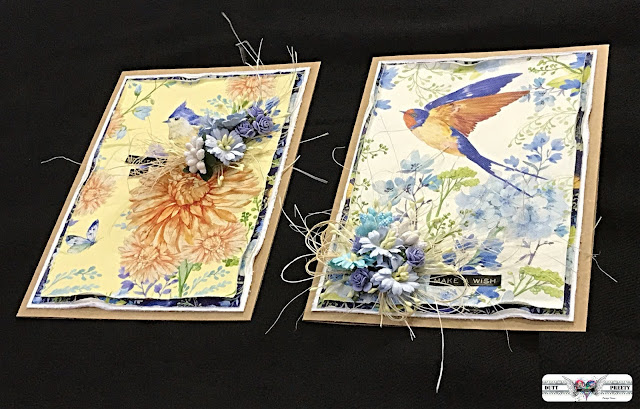
Set of Nature Inspired Cards by Dutt Preety


Hi friends :)
Good Morning !

Today, I'd like to share a Set of Nature Inspired Cards
These are fairly simple to make & great for giving to friends & relatives during happy occasions like birthdays and anniversaries. 
For these cards, I've distressed the edges of the papers and added flowers, pollens & sisal for texture. I hope you'll join the January Challenge where the theme is to "Use Texture". We have awesome prizes on offer. All the details about the challenge can be found HERE & you can add your textured creations on facebook, HERE

 Set of Nature Inspired Cards 


Card 1: Beautiful Day


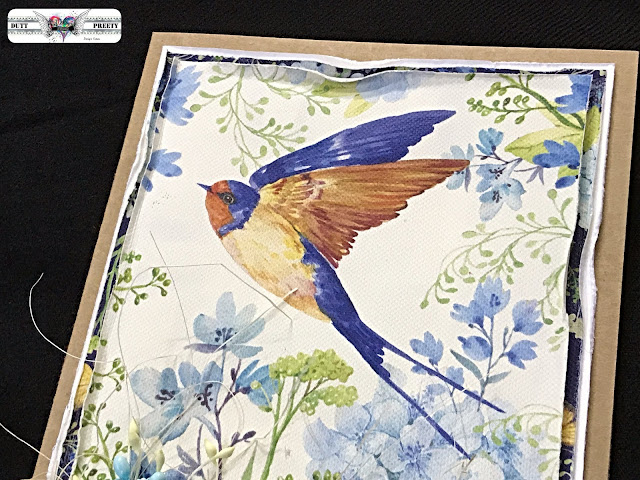
Card 2: Make A Wish


Process:

I've used some pretty decoupage papers from my stash (by Bob n Betty), you can use which ever scrapbooking papers you like best, Art & Soul Studio has a huge collection of pretty papers (I will link some below in the products list), cut them to 4.25 inches by 6.25 inches in size and distress their edges using a paper distressor tool, this creates a subtle textured look. Then applied clear gesso on this paper. After that, I created 2 mats for the panel, each 0.25 inches bigger than the last one, distressed their edges as well. The card is 5 by 7 inches in size, I scored it using a Bone Folder. Then adhered the panel to the first mat using foam tape & all the other layers too using liquid glue. For the floral clusters, I used flowers, pollen & sisal adhered down with gel medium & in the end, I added sentiment stickers. 

Products Used from Art & Soul Studio:

Pretty nature inspired scrapbooking papers- Here, Here & Here
Tim Holtz Metallic Stickers
Tim Holtz paper distresser
Foam Tape

Please don't forget to join Art & Soul Studio's January Challenge. There are awesome prizes on offer & we have a stunning mood board every month. For inspiration, please check out the gorgeous projects made by my talented team mates. 

January Moodboard:

Lastly, please do share your beautiful work with us on our Facebook group- Soul Sisters, we would love to see what you create with supplies from the Art & Soul Studio Store.

Thanks a lot for your precious time :)
Stay Blessed! 
Preeti

Sunday, 9 September 2018

Gold and turquoise mixed media layout by Asia Marquet

Hello everyone:) Today I have for you gold and turquoise mixed media layout which I prepared as a  Guest Designer for Art & Soul Studio. I am so happy to do this guest post- love the philosophy of Art & Soul Studio and all the amazing artists designing there.  To top it of there is this really amazing colour board for September with my fav colour ever- turquoise:) Yes, I know, I like so many colours, but this one is the top of the top;) And it work beautifully with the gold, isn't it true?:) And then I need to stick somewhere on a layout a butterfly! Cool! I was looking for an excuse to add some butterflies to my project but I was stopping myself as, I think, I overdid it recently:) And here I am- in my butterfly heaven;) There it is- the stunning, new moodboard:


37214923_10217061364512289_4546105222186926080_n

Here is a short photo tutorial, but there is also a step-by-step video  on my channel: https://www.youtube.com/channel/UCnSiP80-7LwFXBzNWXhG7GQ?view_as=subscriber

And this is my layout:


So let's start:

First thing was to run the paper through my sawing machine- make the edges and wave- shaped pattern in the middle. I let the end of the threads loose- to me this is something really important to achieve distress effect. Then I added a layer of clear gesso all over the paper, making sure the loose threads will not get glued to the page:


Next step as to add some stencilling- for the first stencil I used crackle paste, for the second- sand paste. And since it was really late at night, I had a no problem to leave it to dry overnight:) This is the best way to achieve big crackle:)  


Morning work was to prepare  some tags and pieces of papers, distress their edges, add some bronze and gold wax to them and wrap the thread around every single one. Then I put everything together, separating the layers with pieces of cardboard and gluing everything with tacky glue. 


Before attaching my focal point to the page, I added some color. Starting with golden mists and continuing with teals and turquoises:


Some stamping:


Under the photo I added  a piece of sparkling foil and lace and covered it in some places with black sand texture paste. Let it air dry.


I cut our a piece of leaves design and added golden colors with mist and wax:


I used two turquoise EP to emboss floral chipboards:


For the pieces of metal I used again either the golden sprays or the golden waxes, or both at the same time:


When all the embellishments were ready, I started to glue everything together- firstly placing the elements on the layout, checking if they work well together and when happy- adhering them to the page either with tacky glue or with a glue gun. At the end I added some splatter;)

Some close ups:


List of products used:

*Lindy's Gang Starbursts: Sassy Saphire, Tibetan Poppy Teal, Time Travel Teal & Golden Sleigh Bell
*Lindy's Gang Glitz Spritz-  Medieval Gold
*Lindy's Gang EP- Guten Tag Teal & Desert Moon Turquoise
*Finnabair- Texture paste Black Sand, Texture Paste Clear Crackle,  Mica Flakes- Gold Leaf, Mini Art Stones & Clear Gesso
*Finnabair metallic waxes- Aged Bronze & White Gold
*AB Studio die cuts from Vintage Elements
*AB Studio stamps #105 & #107
*AB Studio stencils # 110 & #118
*7 Dots Studio paper and tags:  Fortune Teller & Paint Chips
*Lemon Craft. butterfly die cuts- Vintage Time # 021 & #022
*Pebeo- Sand Paste
*Joy Craft stamp- Silhouette Grass
* Carabelle Studio stamp- Guirlandes avec des  Ronds
*Paper Poetry- script stamp
*Creative Embellishments chipboards
*Jet Black Archival Ink
*Winsor & Newton- black china ink
*Tacky Glue
*Gold Glitter


Thank you for stopping by!
Big, crafty hugs,

Asia

Blue Fairy on a Pink Donut Fantasy Acrylic Painting Tutorial

  Blue Fairy on a Pink Donut Fantasy Acrylic Painting Tutorial Glamour Shots Hey there everyone, Kristina ...