Showing posts with label Dusty Attic. Show all posts

Wednesday, 5 December 2018

Angel Dreaming by Abela Artistry

Hi there Soul Sisters...
My turn up on the blog today to share with you some inspiration.  Mixed Media canvas for you playing with some metallic paints and Chipboard. I have been eyeing off these Dusty Attic wings for a while now and wanted to showcase them in a project. 


Here is my process.. 
I started out adhering the chipboard and stones on the canvas. I also used some lace for extra texture in the background and painted it all in white gesso.


I began adding colour to the piece by layering in concentric circles moving inwards. I went from lightest to darkest and being more frugal in my applications as the deepened. 
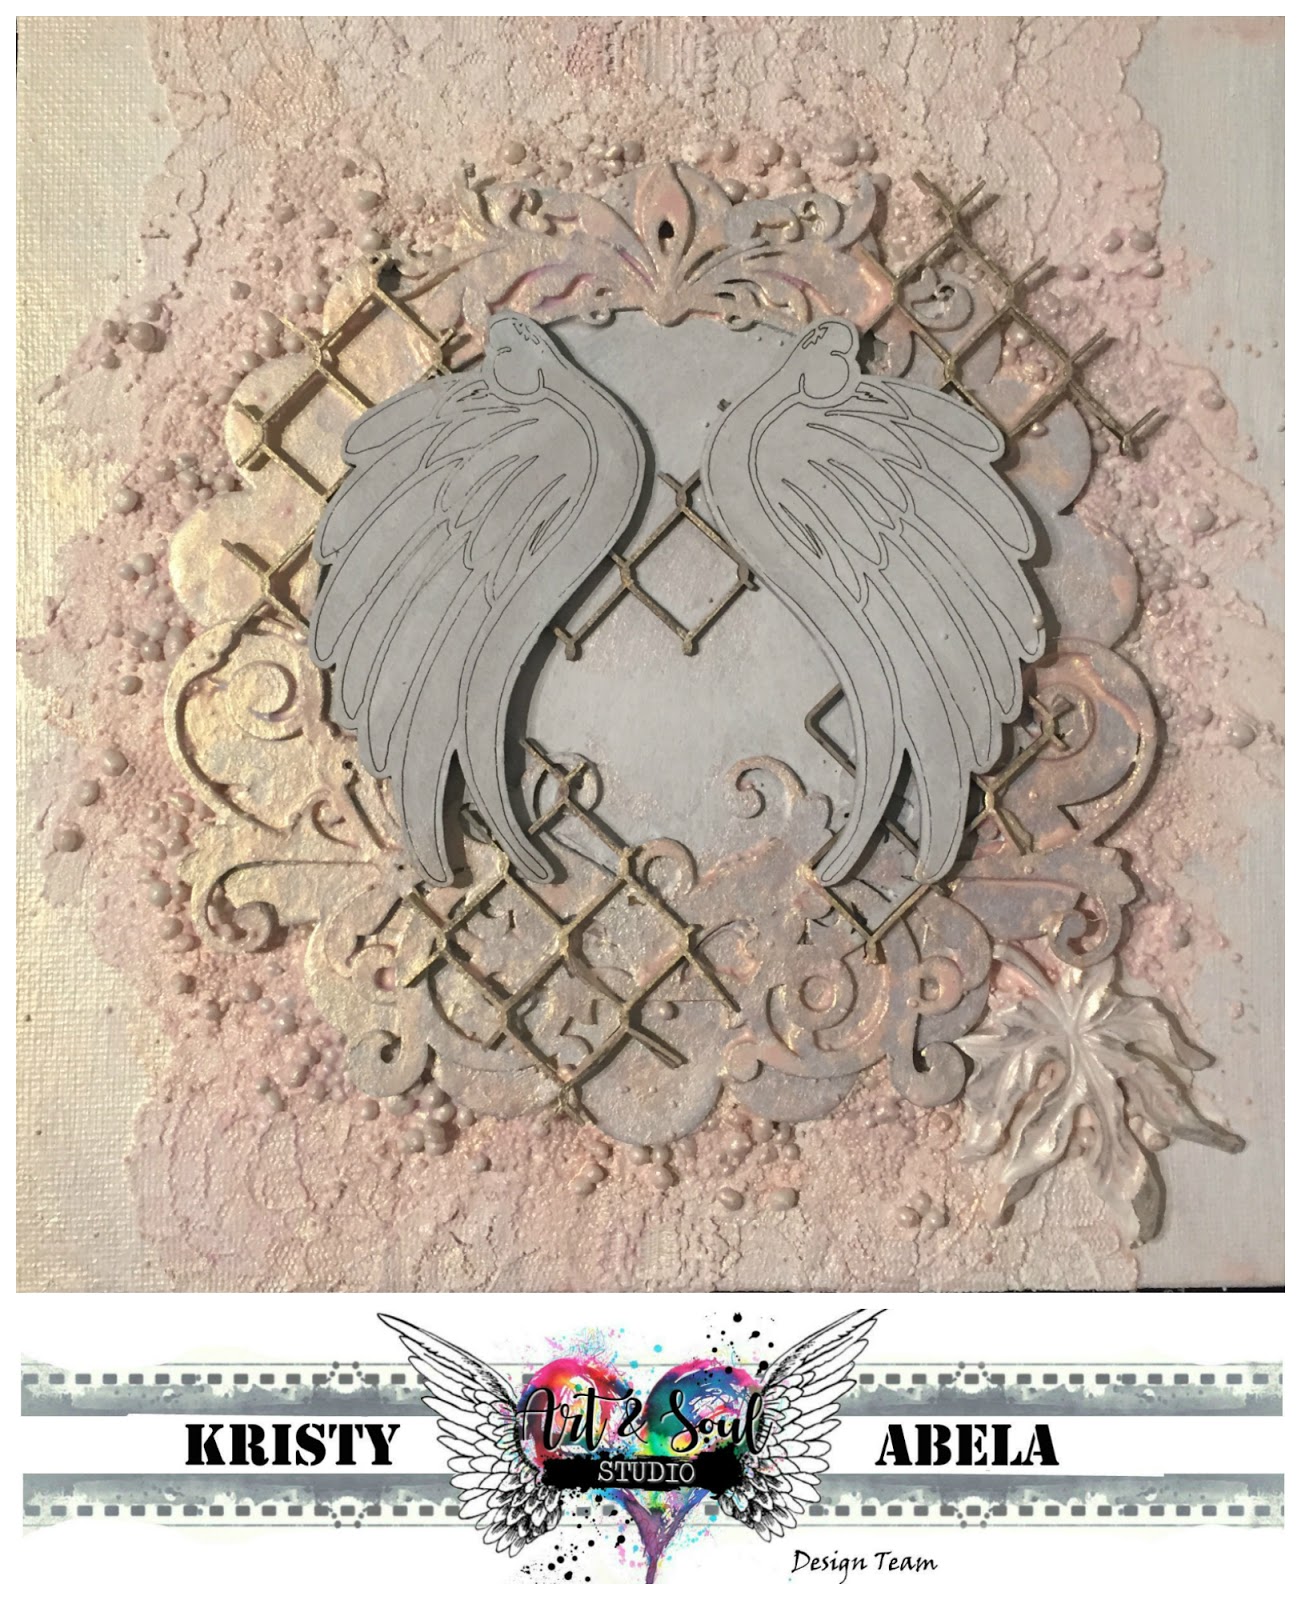

I made sure to dilute the colour with water on the brush and applied it directly. I then sprayed a mist of water to get it too run into the deeper layers. I avoided adding colour to the wings as I wanted to make them a focal point. 


I made sure to dilute the colour with water on the brush and applied it directly. I then sprayed a mist of water to get it too run into the deeper layers. 


Once done I dry brushed some white gesso over the texture to push the colour deeper into the background.
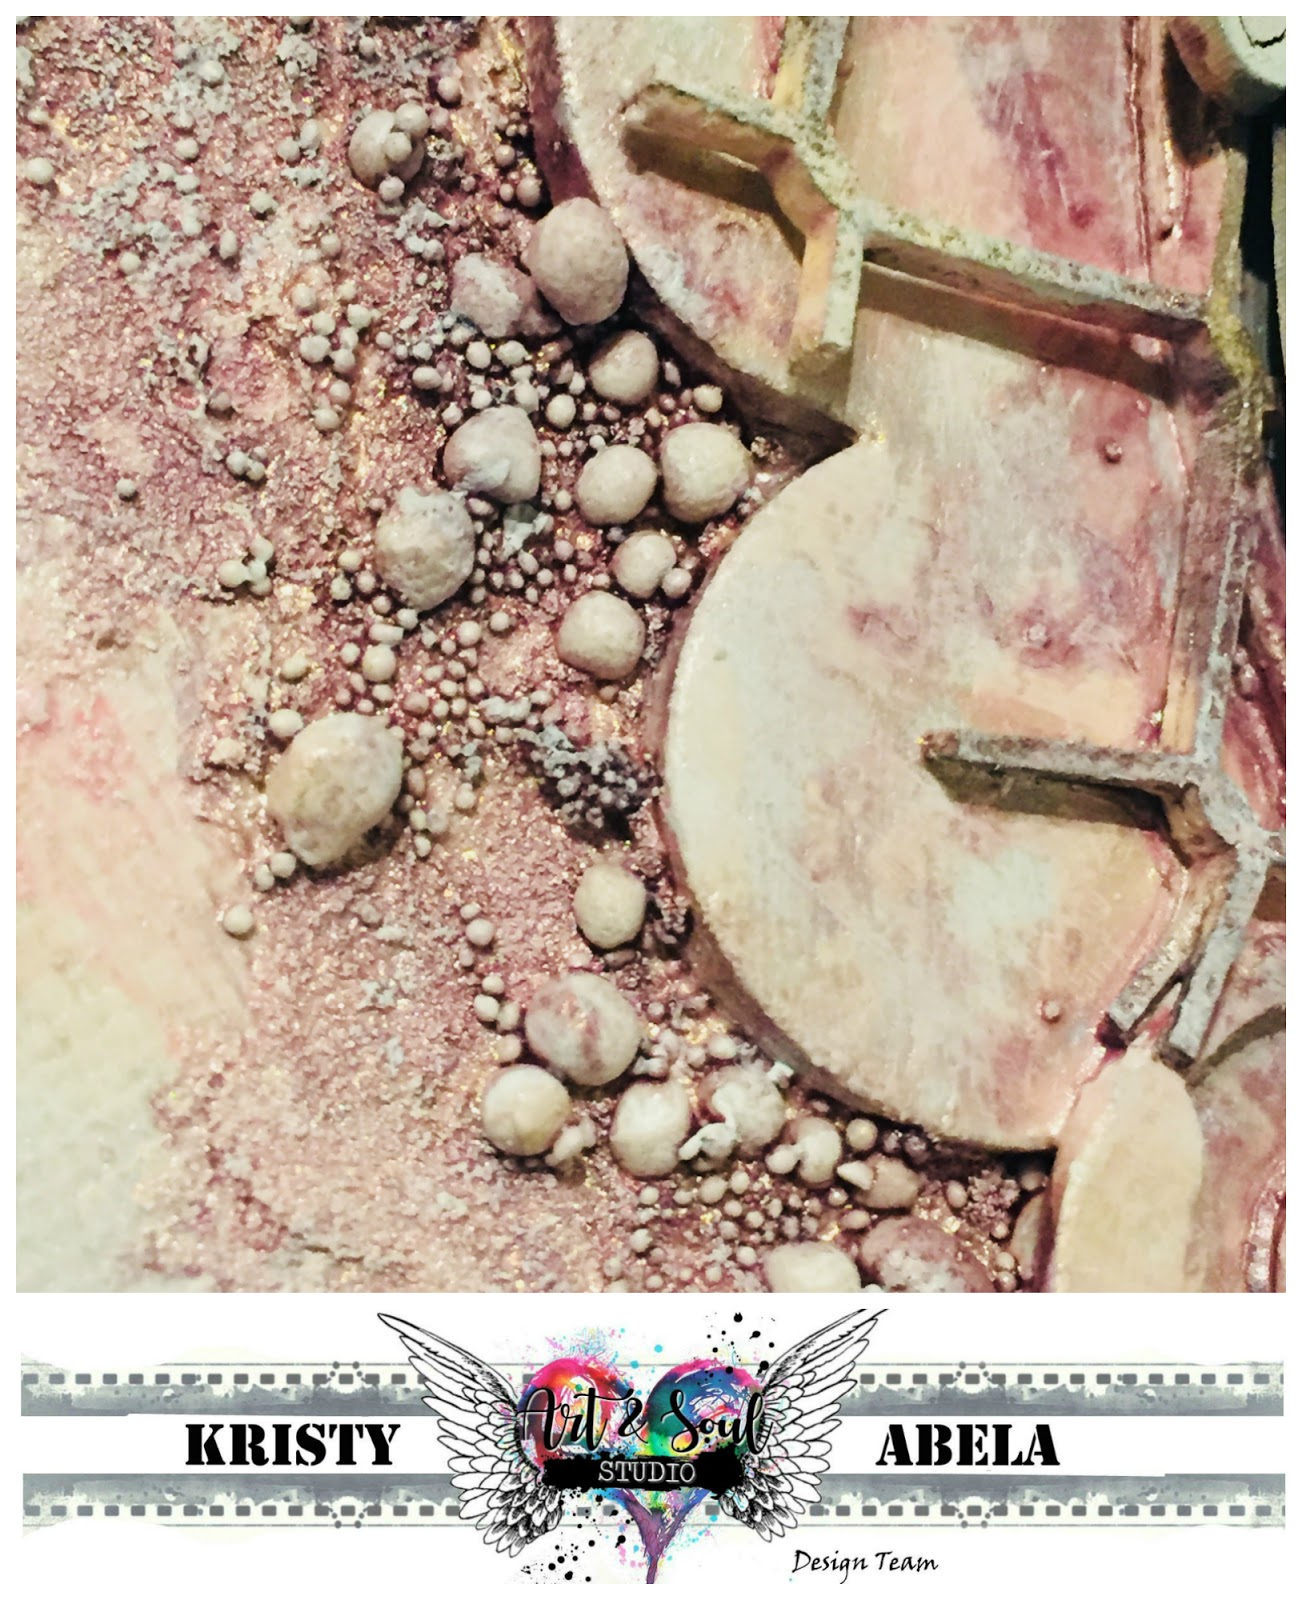

I added some crackle paste... and a little rub of wax onto my stones.


Coloured some Cheesecloth. 


Popped my focal point on top of the cheesecloth and added some string in a halo. 


Used some Glass Glitter, Prills and Beads on my flowers. I wasn't really happy with the intensity of the embossing powder so I muted the colour with some wax. 


And a little bit of black archival ink with a blending tool over the textures.. and a bit of a dry brush with some gold paint over the chipboard. Some art stones to finish off my focal point. Here's a close up of the texture with the fabric.. Thanks for looking. 


Abela Artistry

Product list:
Lindys Stamp Gang - Bodacious Blush
Art Stones
Wax
Flowers 49 & Market - Potpourri Cerise and Hazelnut
Lace 
Cheesecloth

Sunday, 23 September 2018

Braver, Smarter, Stronger & Loved by Kristy Abela - Abela Artistry

Morning Tribe...
Loved doing this one and finally getting a chance to play with some fluid acrylics and my brayer... 


I applied three layers of paint onto an old book with my brayer. I put the paint onto my craft sheet first and gave it a spritz of water to activate the fluidity.

I then used two stencils, both from Dusty Attic to add some interest on the background and applied with a sponge dabber to avoid bleeds. I used a cap to create some circles and added a few splatters while the paint was juicy. 

Finally got to try this colour Quinacridone Gold.. One of my favourite journal artists uses this colour and I wanted to see what all the fuss was about. Knowing I love earthy tones.. I am in love too.


I used Gel Medium to apply some strips of paper to the page and rubbed alight coat of Gesso onto the top so I could apply paint. The paint doesn't like to stick to the gel medium otherwise. 

I used my cap to add some more circles to try and pull the foreground into the background. I used the dark grey colour from my first layer to do this.


I dabbed some colour onto the top of the page and spritzed with water to get the paint to run. I then repeated the process with a turquoise colour to create a patina effect.


To add some depth to the background I used a charcoal pencil to outline the strips of paper and create some shadows.


I wasn't really sure what I wanted to do with the circles... I still wanted to play with the fluid acrylics and picked up an off white colour and some watercolour pencils in similar shades. 


I put one coat of paint on the page as a base. I applied the pigment from the pencil and then applied a second layer of paint and then blended it in.
To finish them off I outlined the circles with the charcoal pencil and blended.


I ran a piece of string off the roll and let it fall onto the page. I attached it with Brads and stuck my title down... DONE!! 
So easy! Check out some of the close ups below and check out the full product list below... Thanks for looking!


Abela Artistry
Product used:
Dark Grey / Medium Grey / Raw Sienna / Titan Buff / Quinacridone Gold / Cobalt turquoise
Dusty attic Stencil  - Cross hatch and Checker plate
Brads, Cogs and paper strips from my stash

Monday, 27 August 2018

August Mood board Inspiration - Kristy Abela


Happy August.. 
I had to admit Amanda had me on my toes with this one... I put my Big Girl pants on and embraced my 'pink'... Hope you get some inspiration from it. 


Kristy Abela - Abela Artistry
Mood Board Challenge Rules

Please use our mood board as inspiration to create an art journal page, a card or a scrapbooking layout. Use the mood board however you want but you must add your own handwriting on your project.

As these challenges are sponsored by Art and Soul Studio please make sure that you use at least one product that is available from the store.

There are 3 x $50 vouchers up for grabs!! One will be awarded for scrapbooking layouts, one for cards and one for mixed media/art journaling.

You can enter an art journal page, a card and a layout but you cannot win all three.

You have until the 11:59pm on the 31 August to enter and then the design team will vote to determine the lucky winners.

Please note that the vouchers can only be won by residents of Australia but if you are from overseas and win the challenge you will be offered a guest design team spot.

Sunday, 5 August 2018

Make a Wish - Kristy Abela (Abela Artistry)

Hi Everyone.. Welcome to my inspiration post...
I really wanted to follow up on the quick bite I posted last time to show you how you can take those techniques one step further and create a Steampunk masterpiece.. 


In this project I created a black canvas with pieces of Corrugated cardstock and tissue paper using gesso as a base and also as a 'glue'. 
I primed the canvas and put the scrunched up tissue paper on top to create lots of texture. Then I layered my cardboard on top and added some gyprock mesh tape to finish the background. I then arranged my Chipboard to figure out how I wanted the piece to go... Painted it all black and then began.

I sprayed some Lindys on the background and used some wax to colour the gate to make it pop out of the background. Once dry I used some gold paint to drybrush over the surface to bring out the texture.

I gathered the chipboard that would make up the bulk of my background and used some Rust paste to age it into my coppery patina background. Once completely dry I used some wax to add a colour variation on the cogs.


I layered on my chipboard and Metals (also painted black and Waxed for colour) and saved the main focal point to last. I wasn't sure which colour direction I wanted it to head... In the end I chose some darker blues with Opal Magic paint and turquoise and silver wax to tie in the background with the foreground. 


Added some Art stones and popped a Melange over the center of the padlock. I then used the Lindy's sprays with a brush to colour them.. I didn't want them to be too dark. If you look closely you can see where I did an experiment with a few to see.. Here's your Wheres Wally moment.. Hint: bottom corner..

 Abela Artistry
Thanks for stopping by.. Happy Crafting!!

Product list

Dusty Attic: Ornate Gates - Large 
Scrap FX: Steampunk contraption
Prima/Finnabair Art Ingredients Melange
Lindys Starburst - Tibetan Poppy Teal
Lindys Moon Shadow Mist- Crows Nest
Prima Rust Effect Paste ( On Sale Now)
Art Alchemy Metallic Paint - Steampunk Copper
Art Alchemy Opal Magic Paint - Aqua Rose 
 Butterfly charms
Tim Holtz Quote Chips


Sunday, 24 June 2018

Live in the Moment - Kristy Abela - June Challenge


Why stop at one play with the June Moodboard... I came across the new release papers for Cocoa Vanilla - Boy Rule!! Wow... so I had to mix it up with the June Challenge at Art and Soul!! Check out my Layout with the June Colours and "Use your handwriting" Rule.


Papers - Cocoa Vanilla
Chipboard - Dusty Attic - WOW - 2Crafty
Sprays and Embossing powders - Lindys

Love to see what you think... Leave me a comment!!

Sunday, 27 May 2018

Steampunk Tags with Kristy Abela

Happy Sunday Funday!! Have a peek at this over your morning cuppa!
Today I get to follow on from my Industrial Steampunk styled Mood Board Challenge to play with the same theme on an set of tags I created.


After sticking down the Stamperia papers to the tags and adding some mesh (Gyprock tape) with 3D gel,  I used a stencil and sprayed a fairly heavy coat of Tim Holtz Resist spray. Once this dried I used Distress Oxide in Evergreen Bough and applied a heavy layer over the whole surface to pick up the exposed bits of paper that the resist spray didn't reach. With a dry cloth I polished off the excess. 


I added the super funky Architextures and a layer of Nuvo Mousse through a stencil. I applied some Distress Crayon with my finger and rubbed it all over the raised surfaces to create shadows. Then inked the edges to finish off my background.

I used Embossing powder and waxes over black gesso on my chipboard and veneers. Tore a piece of calico and distressed it to frame my globes. I added in the door knobs and keyhole embellishments. Stamped some inspirational quotes and finished off with some Art Stones and Micro Beads from Prima.


Thanks for joining me at Art & Soul


7 Gypsies Findings - Painted Candlestick Collection
Scrap FX - Suspended Time
Dusty Attic Chipboard Mini Brick Wall / Mini Chicken Wire / Industrial Globes
WOW Wood Veneer - Chandelier
Tim Holtz stencil - Clocks - THS013
TCW Stencil - Bricks - TCW 191s
TCW Stencil - Corn cob TCW 619S
Versamark Black Pigment Ink pad
Lindys Embossing - Midnight Emerald-Midnight Bronze-Silver Moon Turquoise
Art Stones - Regular
Prima Micro Beads - Copper


Blue Fairy on a Pink Donut Fantasy Acrylic Painting Tutorial

  Blue Fairy on a Pink Donut Fantasy Acrylic Painting Tutorial Glamour Shots Hey there everyone, Kristina ...